Unleashing the Power of Rapid Digital Creation
In today’s fast-paced digital landscape, the ability to create educational and engaging content swiftly stands as a critical success factor. Whether it’s designing interactive workbooks for kids, comprehensive teaching materials, or eye-catching personalized invitations, the efficiency of your digital toolkit plays a pivotal role. Let’s embark on an exploration of an essential digital toolbox comprising Excel, Affinity Publisher 2, Chat-GPT, and YayImages, all designed to transform your creative endeavors into a seamless and efficient journey.


Follow These Simple Steps to Efficient Product Creation
- Why These Tools? A Digital Publisher's Ideal Arsenal
- Seamless Integration: The Hallmark of Efficient Digital Crafting
- Step 1: Identifying Your Niche – Charting the Course for Digital Success
- Step 2: Constructing Your Data Foundation – Laying the Bricks for Your Digital Business
- Step 3: The Visual Voyage – Curating Images That Tell a Story
- Step 4: Crafting Your Digital Canvas – Designing with Precision and Creativity
- Step 5: The Final Ascent – Merging and Materializing Your Vision
- Bringing It All Together – Your Passport to Digital Product Mastery
- Cost Breakdown
Why These Tools? A Digital Publisher’s Ideal Arsenal
Excel emerges as the cornerstone of this strategy. Much more than just a spreadsheet application, it acts as a reliable data repository. Its versatility allows you to organize, store, and repurpose data across various projects effortlessly. Imagine Excel as the Swiss Army knife in your digital toolkit; it’s that indispensable.
Transitioning to design, Affinity Publisher enters the scene as a cost-effective yet robust design tool. Think of it as the perfect sidekick to Excel, facilitating a smooth integration that makes designing as effortless as it is enjoyable. Its user-friendly interface turns complex design tasks into a piece of cake.
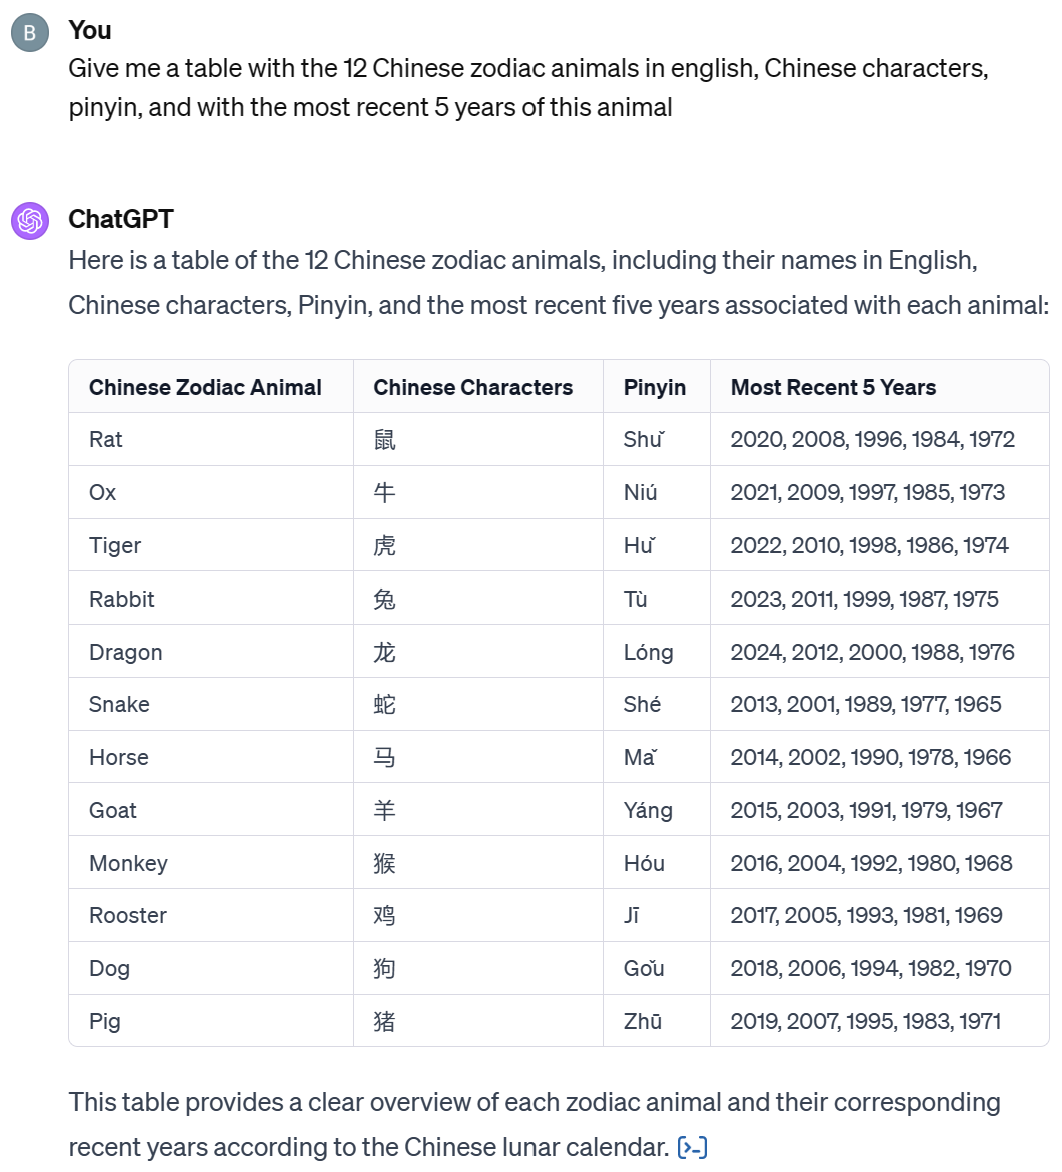
Next, we introduce ChatGPT, your AI-powered assistant. This innovative tool takes center stage in accelerating content creation. ChatGPT deftly constructs data tables and suggests content, laying out the groundwork for your entire data set. It ensures that your products are not only comprehensive but also engaging and informative.
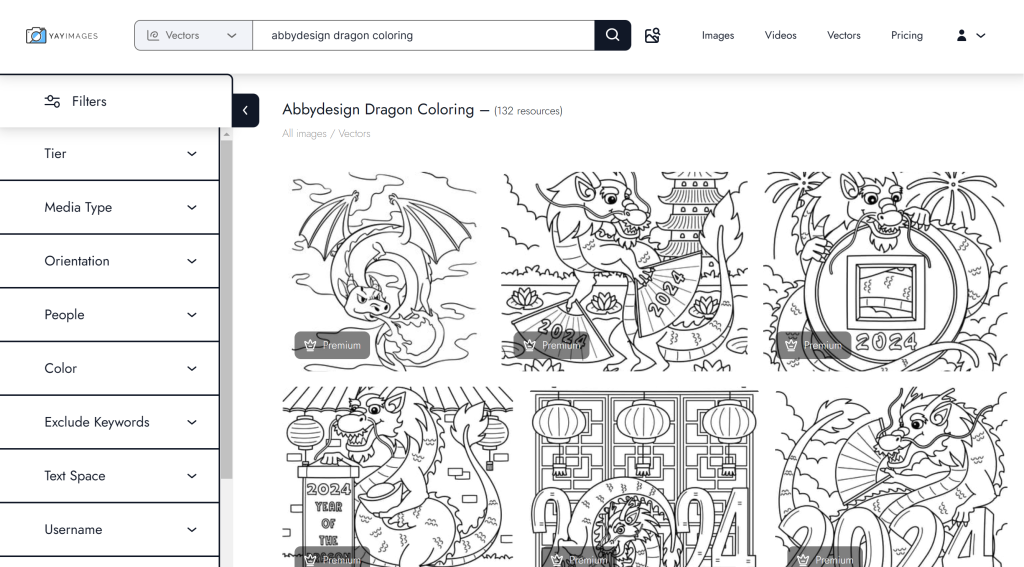
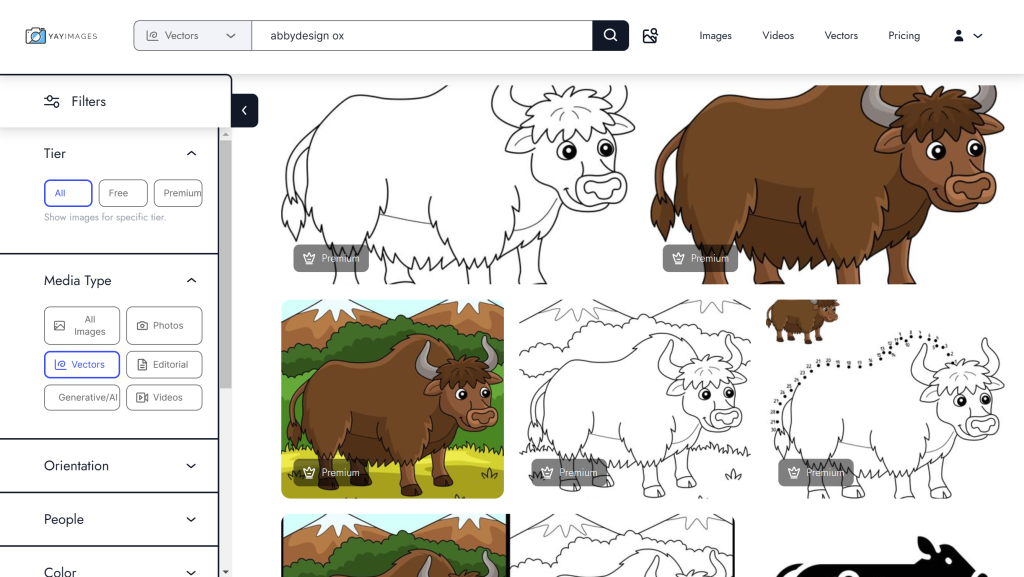
Finally, YayImages rounds out your toolkit, acting as a vast digital library. Here, you can access a wealth of vectors, images, and videos, each ready to add a visual punch to your digital creations. YayImages offers the artistic flair needed to elevate your projects from good to exceptional.
Seamless Integration: The Hallmark of Efficient Digital Crafting
The synergy between these tools forms the bedrock of this quick-creation strategy. Excel’s data management capabilities, combined with Affinity Publisher’s design prowess, create a foundation for high-quality digital products. ChatGPT’s AI assistance enriches this process by adding a layer of speed and innovation in content development. Meanwhile, YayImages provides the visual elements that bring your creations to life.
In sum, this dynamic combination of tools not only streamlines the creative process but also ensures a high standard of quality in your digital products. By harnessing the power of these tools, you’re well-equipped to meet the demands of the digital age, crafting content that is both captivating and educational with remarkable efficiency.
Step 1: Identifying Your Niche – Charting the Course for Digital Success
Finding your niche is like choosing your favorite adventure. It’s all about discovering what you love and sharing it with others. Here’s how to make it fun and easy:
- Think About Your Favorites: Start by thinking about what you really enjoy. Do you love cooking, drawing, or maybe playing video games? Your niche should be something you’re excited about, just like your favorite hobby.
- See What’s Trending: Use the internet to find out what topics people are looking for. Tools like Google can show you what’s popular. It’s like being a detective, searching for clues about what people like.
- Social Media is Your Friend: Check out what’s hot on sites like Facebook, Instagram, or Twitter. What are people talking about? What gets lots of likes and shares? This can give you awesome ideas for your niche.
- Give It a Go!: Now, try out your ideas. Websites like Teachers Pay Teachers or Etsy are great places to start. You can put up your stuff for free or for a small fee. It’s like setting up a lemonade stand in your neighborhood to see if people like your lemonade.
By following these steps, you’ll find a niche that you love and that other people are excited about too. It’s all about having fun and being curious. When you find the right niche, creating your digital products becomes a joyful journey!
Enhance Your Niche-Finding Strategy:
- Combine Interests: Fuse diverse interests to carve out a unique niche. For instance, blending ‘Mandarin learning for children’ with ‘interactive storytelling’ can captivate a niche market seeking immersive educational experiences.
- Spot Market Gaps: Keep an eye out for underserved areas. A gap in quality resources is your invitation to innovate and serve a waiting audience.
- Stay Nimble: The digital terrain is ever-changing. Keep your finger on the pulse of emerging trends and be ready to adapt. This agility can transform a fledgling idea into a trendsetting venture.
By the end of Step 1, you’ll have a niche that not only promises growth but also ignites your creative spark. It’s this synergy that will empower you to craft digital products that truly resonate with your audience and stand the test of time.
Step 2: Constructing Your Data Foundation – Laying the Bricks for Your Digital Business
Now that you know what your project is about, it’s time to gather all the information you need. Think of this like collecting all the pieces for a big puzzle.
- Create Comprehensive Lists: Kick off by generating comprehensive lists that align with your niche’s core topics. Employ ChatGPT to swiftly produce tables that not only cover the basics but also delve into nuanced details that enrich your content. Incorporate
- Additional Data: Dive deeper by incorporating supplementary information that adds value to your base data. For language learning materials, this might include phonetics, example sentences, or cultural notes. This enriched content enhances the learning experience, making your products both informative and engaging.
- Prepare Data for Integration: Before importing into Excel, streamline your data. Copy your enriched tables into Notepad to strip any unwanted formatting. This cleanliness ensures seamless integration into Excel, where your data can be easily manipulated and styled for your end products.
A simple prompt can go a long way on GPT-4.
Tips to Make Your Information Even Better:
- Use Shortcuts: In Excel, you can set up shortcuts to do some of the work for you. This saves time and makes sure everything is done the same way.
- Check Your Work: Make sure all your information is correct, especially if you’re making something educational. You want to make sure you’re teaching the right stuff!
- Make It Personal: Think about different ways people might use your project. Can you change it a bit for different people? This way, more people can enjoy what you’ve made.
- Plan for the Future: Set up your project so it can grow and change over time. This means you won’t have to start all over again if you want to add new things later.
By getting all your information ready and organized, you’re setting up your project to be really great. This step makes sure that when you start putting everything together, it’s easy, fun, and turns out just right!
Step 3: The Visual Voyage – Curating Images That Tell a Story
Now, you’ll set sail on the visual aspect of your digital products. Images are the storytellers that captivate your audience, and finding the right ones is an art in itself. This stage is about creating a visual narrative that complements your content and engages your users.
- Start Your Picture Hunt: Begin by looking for pictures online. Websites like YayImages have lots of great choices. Try to find pictures that match what your project is about. If your project is like a cake, think of pictures as the icing that makes it look and taste great.
- Choose Carefully: When picking pictures, think about what you want them to say. Black and white pictures can make things look serious and classy. Colorful pictures can make your project fun and lively. Make sure the pictures match the feeling of your project.
- Make Your Pictures Perfect: After you download your pictures, you can change them a bit to fit your project better. Maybe you crop them to show just the right part, or change the colors to match your style. It’s like tailoring a dress or a suit to fit perfectly.
- Keep Everything Organized: Put your pictures in folders on your computer so you can find them easily. This makes it a lot easier when you need to find them again.
Extra Tips for Awesome Pictures
- Stay Consistent: Try to make all your pictures have a similar style. This makes your project look really professional.
- Ready for Anywhere: Sometimes people will print your project, and sometimes they’ll look at it on a screen. Make sure your pictures look great no matter how people see them.
- Keep Track of Picture Rights: Remember to keep a note of where you got your pictures and if you’re allowed to use them. This is important to make sure you’re using pictures the right way.
- Add Descriptions and Captions: Write little descriptions for your pictures. This helps everyone understand them better, and it’s also good if your project goes online.
As you curate and refine your image collection, remember that each visual element should serve your narrative and enhance the educational value of your products. Well-chosen images will illuminate your content, making it memorable and more impactful. By the end of Step 3, your digital products will not only be informative but also visually enthralling, ready to capture the minds and hearts of your audience.
Step 4: Crafting Your Digital Canvas – Designing with Precision and Creativity
Now that you’ve picked your pictures and information, it’s time to put them all together. This step is like turning your ideas into a real picture. You get to be both careful and creative here.
- Plan Your Design: First, think about how you want your project to look. You can draw a picture or just imagine it in your head. Think about where everything should go, like where the words and pictures will be. It’s like planning a fun trip – where will you go first, what will you see next?
- Start Using Affinity Publisher: Next, open up Affinity Publisher on your computer. This program helps you put all your ideas into one place. It’s like a big art studio where you can make your project look just the way you want.
- Put Everything Together: Now, bring in all your words and pictures. Affinity Publisher makes this easy. It’s like putting puzzle pieces in the right place.
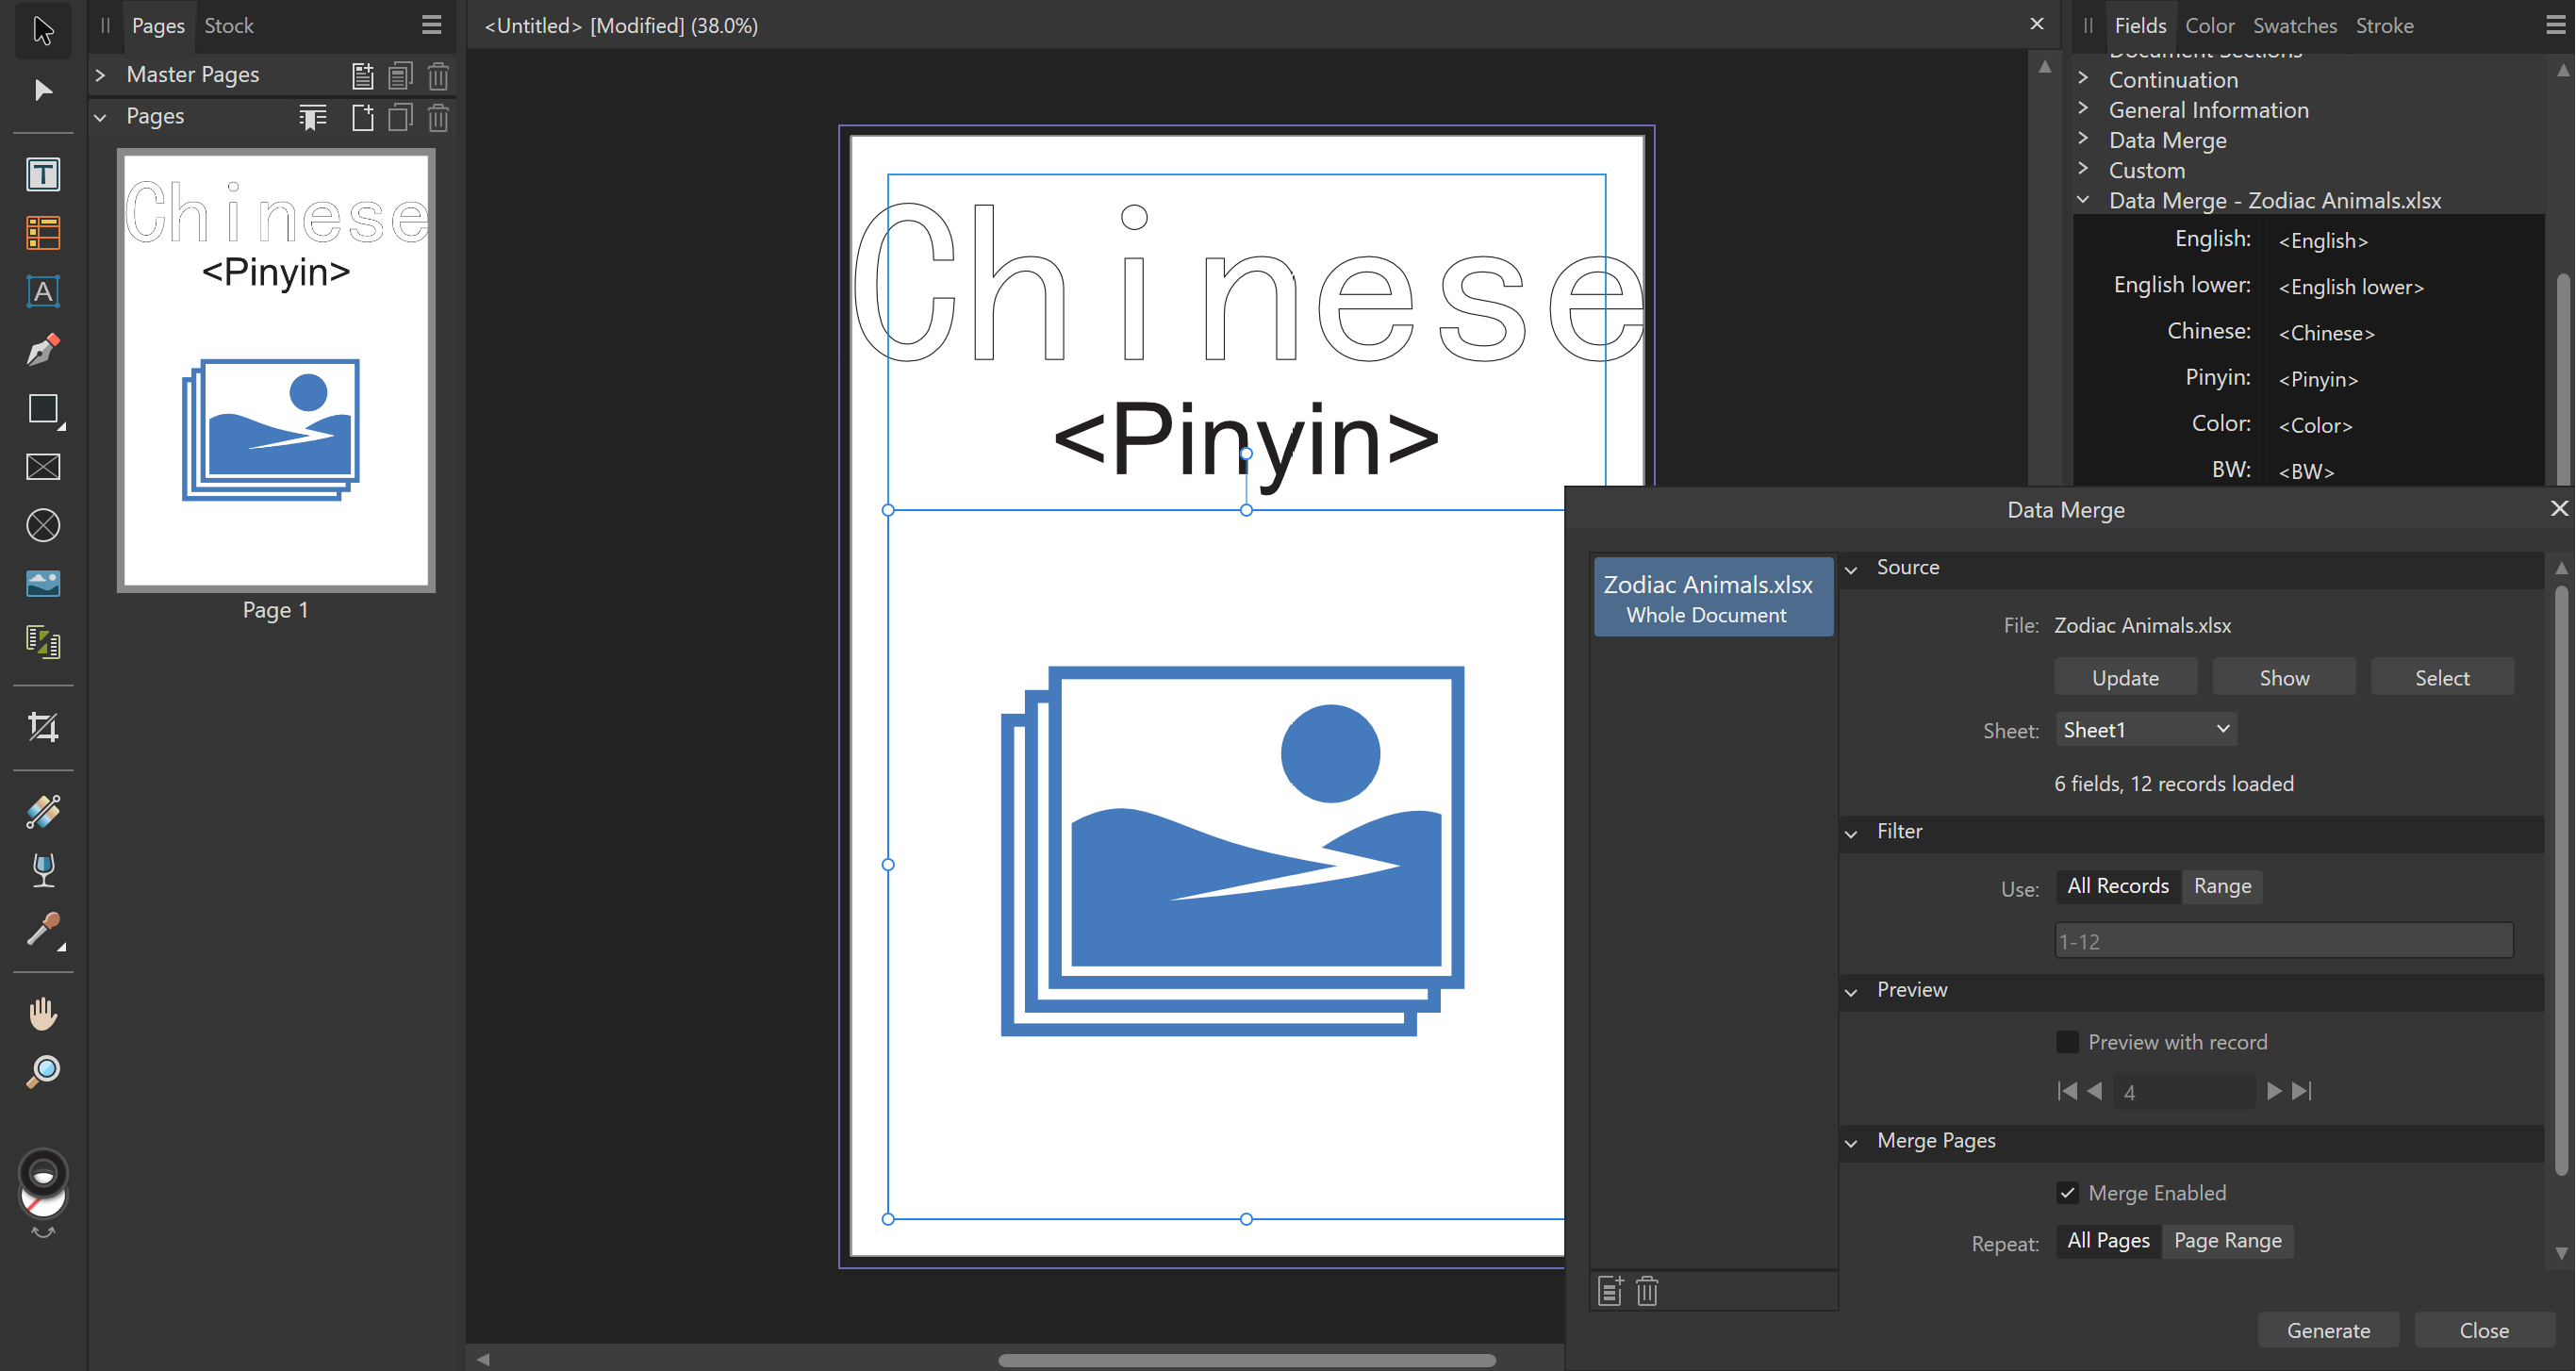
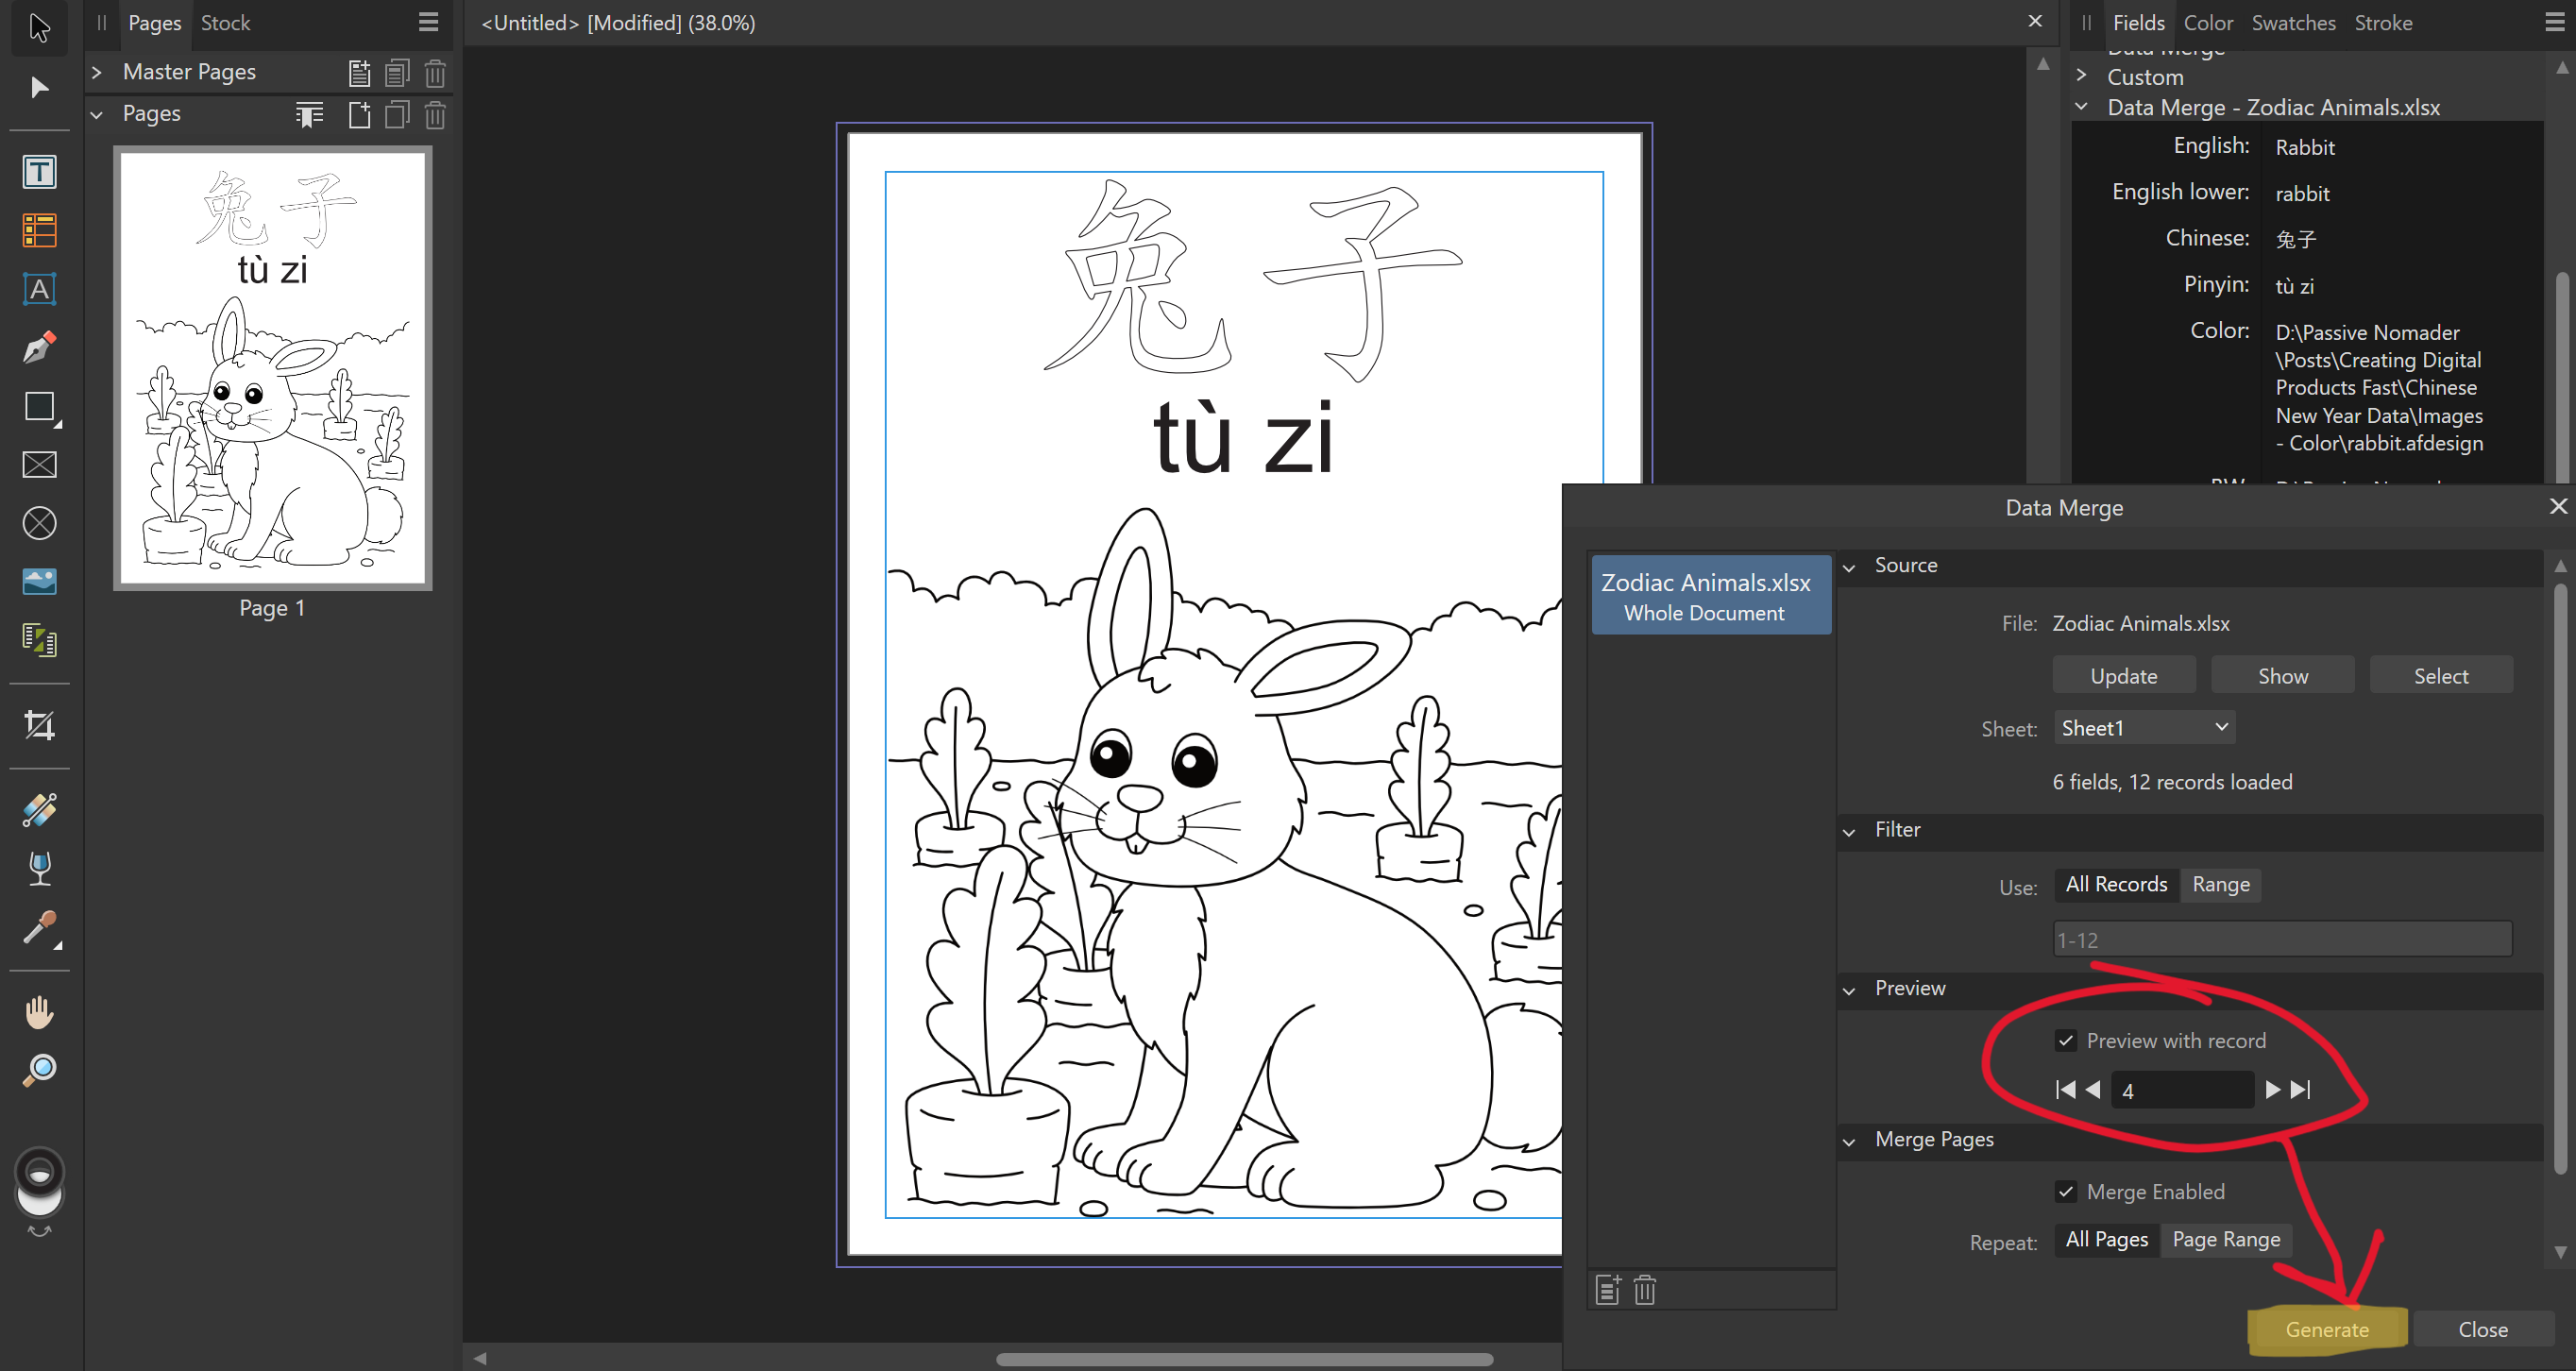
- Make Different Versions Easily: With a cool feature in Affinity Publisher, you can make lots of versions of your project really quickly. This is great if you want to make things like special invitations or learning pages that are a little different for each person.
- Check Everything Over: Before you say you’re done, look over everything one more time. Make sure everything looks good and is in the right spot. It’s like doing a final check before you go on stage in a play.
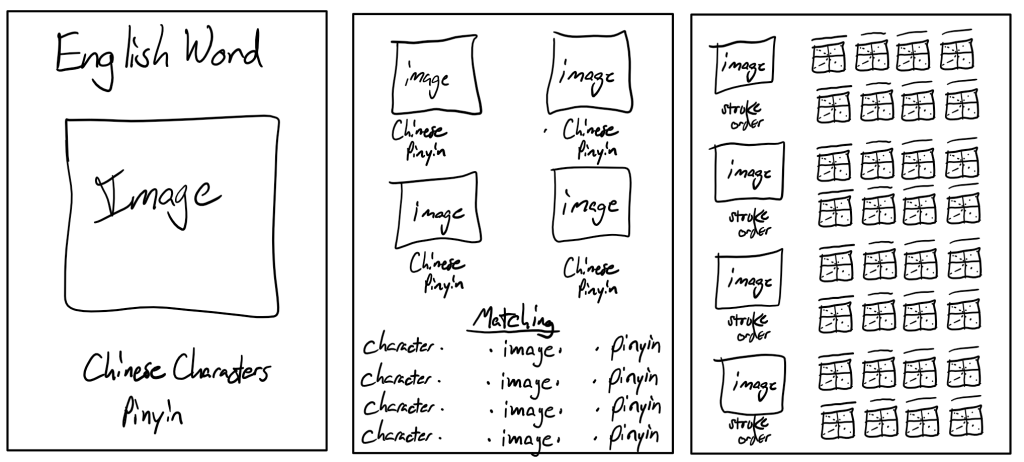
Click the Above Images to View the Process (YouTube Video Coming Soon)
Some Tips to Make Your Design Even Better:
- Be Ready for Anywhere: Think about how people will look at your project. On a phone? Printed out? Make sure it looks good everywhere.
- Get Opinions: Show your design to a few people and see what they think. Their ideas can help make your project even better.
- Keep Improving: Don’t worry if you need to change your design. Sometimes the best ideas come after you’ve started.
- Make It Work for Everyone: Make sure everyone can enjoy your design. Check that it’s easy to read and use for all people.
By following these steps, you’ll make a project that not only has all the right information but also looks great. Step 4 is where you see your project start to come alive. You get to mix your ideas with pictures and words to make something that looks professional and fun!
Step 5: The Final Ascent – Merging and Materializing Your Vision
This is the exciting part where everything you’ve worked on comes together! Now, you’re going to combine all your information and pictures to make your final product. It’s like putting the last piece in a puzzle.
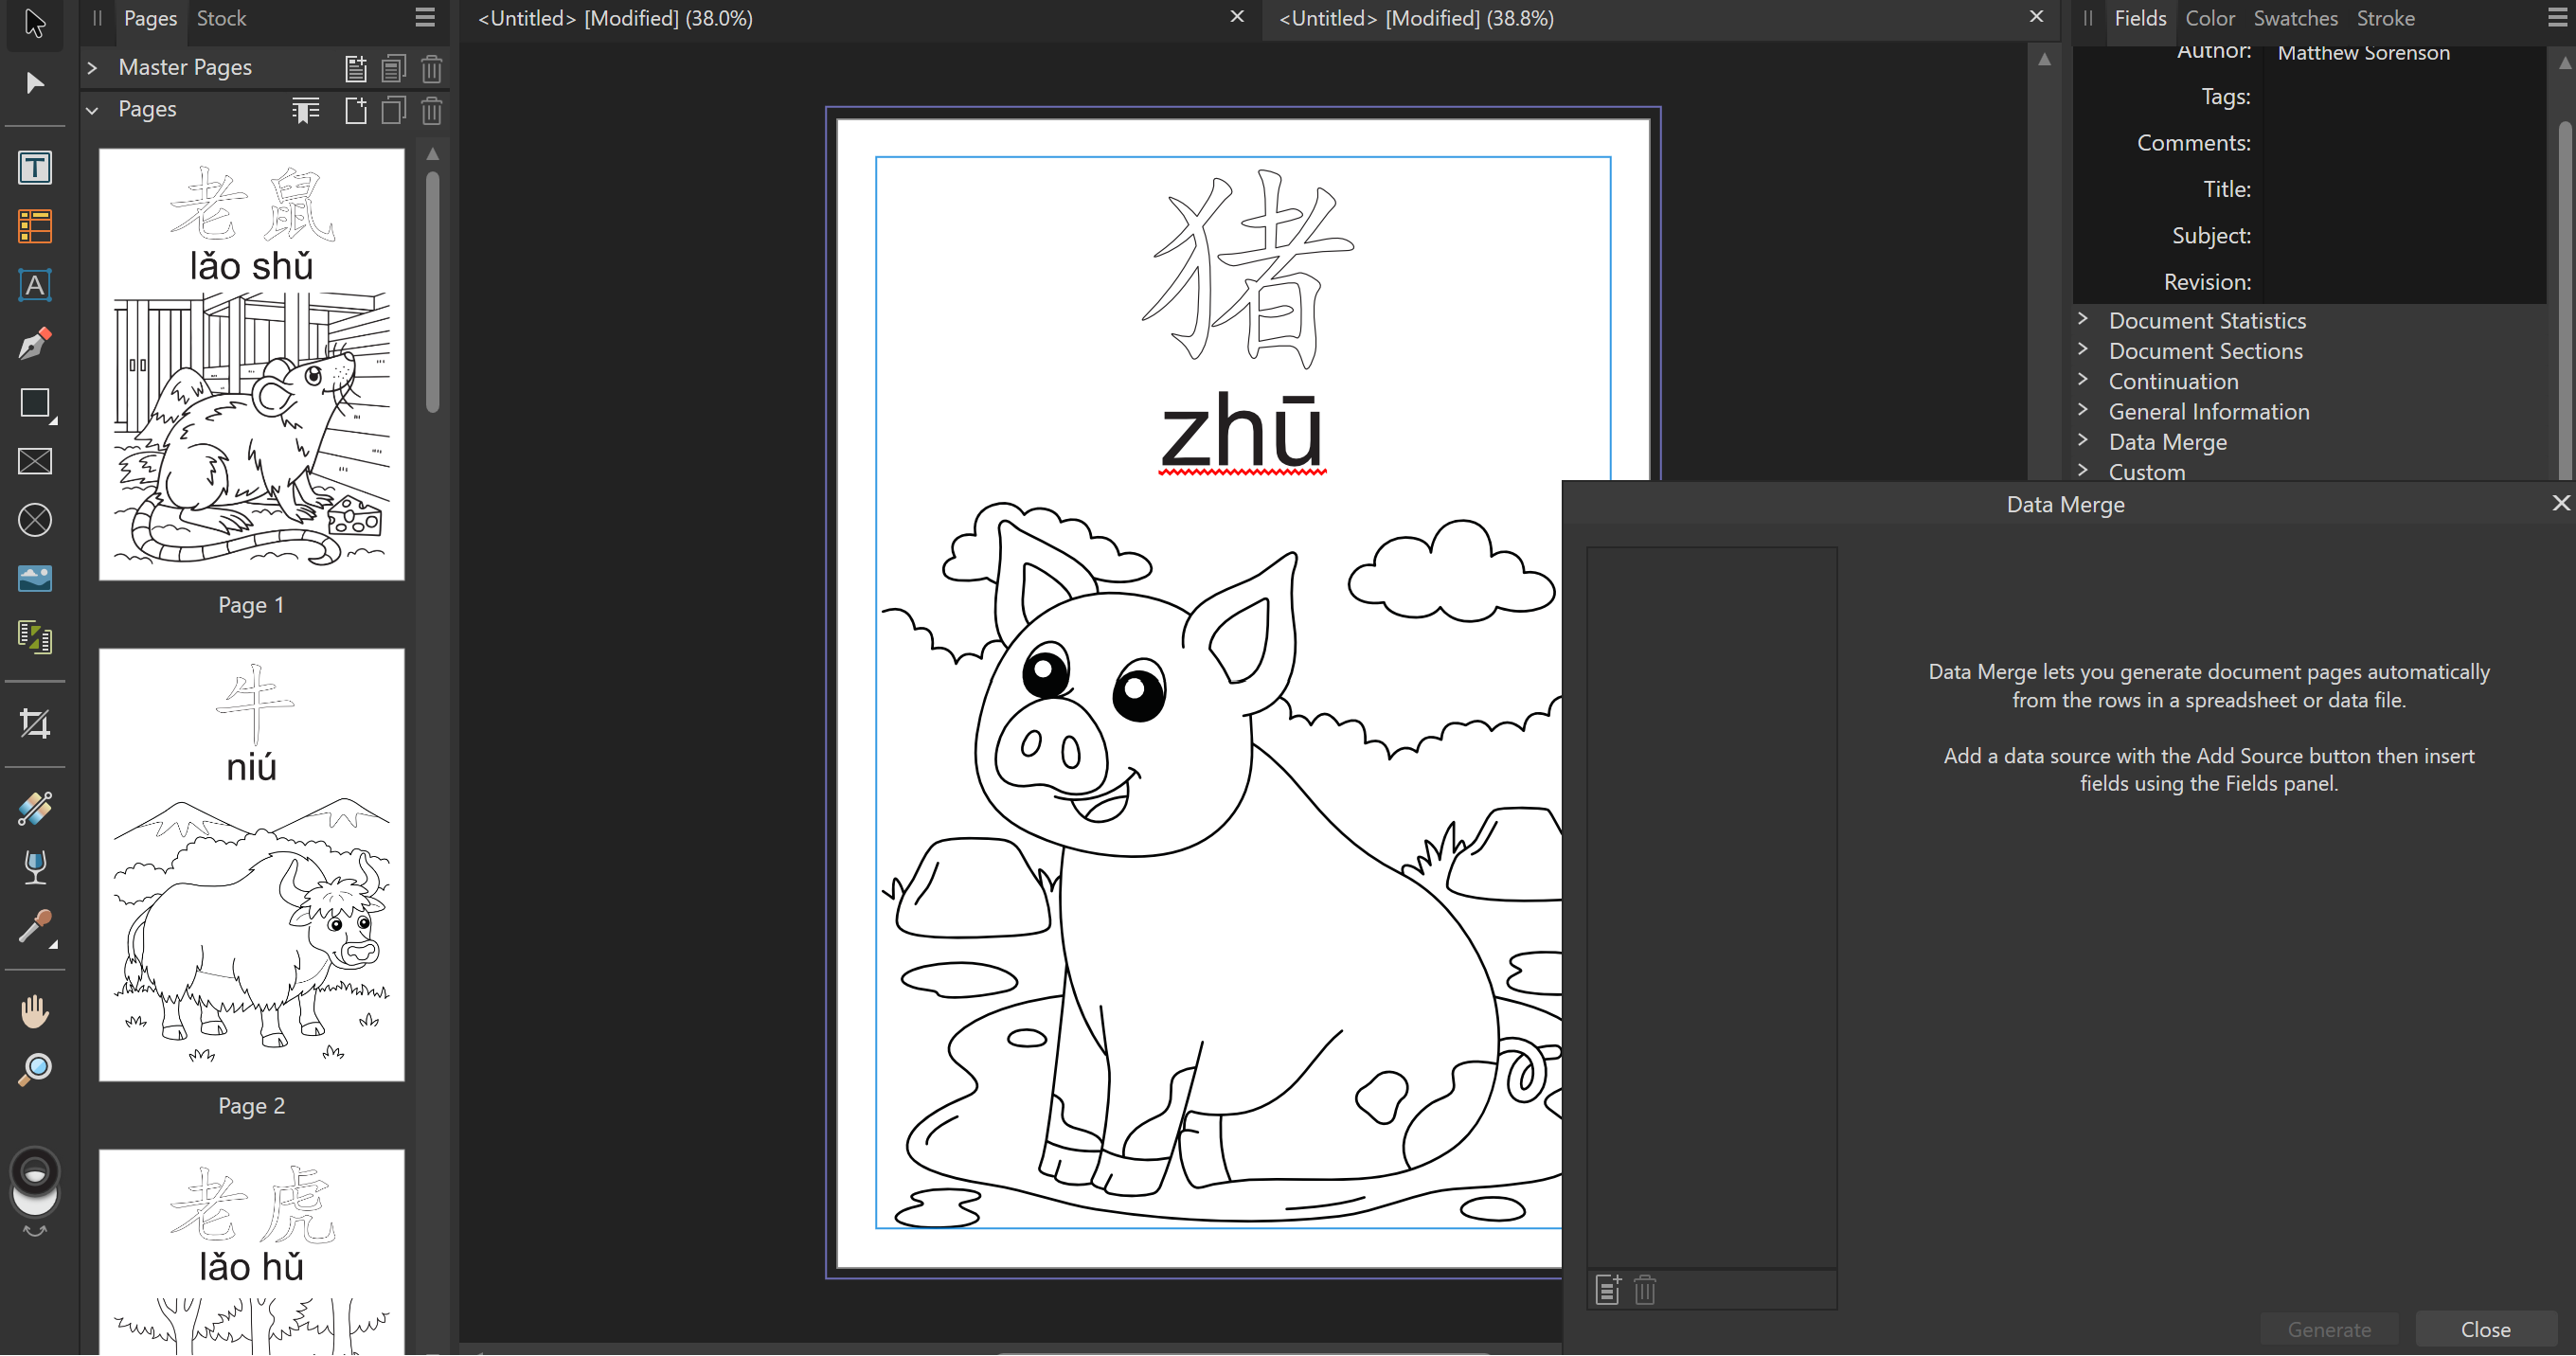
- Start the Merge: First, you click a button in your design software, Affinity Publisher, and start combining your words and pictures. It’s like telling a computer to start putting everything in the right place, making your project look just how you want it.
- Check Everything Carefully: Next, you need to look at every part of your project. Make sure everything looks right – no weird picture placements or misspelled words. This is important to make sure everything you made is easy and fun for people to use.
- Get It Ready to Share: When you’re sure everything is perfect, you turn your project into a PDF. This is a type of file that everyone can open and look at. It’s like wrapping a present before you give it to someone.
Tips to Make Your Project Even Better
- Do Things in Batches: If you are making lots of similar things, do them all at once. This saves time and makes sure they all look consistent.
- Use a Checklist: Having a list to check off each part of your project makes sure you don’t forget anything. It’s like having a grocery list when you go shopping.
- Think About How People Will Use It: Will they print it out or look at it on a computer or phone? Make sure your PDF looks great no matter how people use it.
- Keep Your Work Safe: If your project has special information you don’t want people to change, you can add protection to your PDF.
By following these steps, you turn your ideas into a real, professional-looking thing that people can use and enjoy. It’s a great feeling to see your hard work become something useful and fun!
Bringing It All Together – Your Passport to Digital Product Mastery
You’ve journeyed through the five pivotal steps of creating digital products, from the seed of an idea in finding your niche to the final flourish in exporting your crafted content. This process isn’t just a formula; it’s a framework that’s adaptable, flexible, and designed for the digital artisan in you.
As we draw the curtains on this guide, remember that the strategies and tools we’ve explored are not confined to a single type of product. This versatile approach can be the wind beneath your wings for a multitude of digital creations:
- Personalized Learning Plans: Use this strategy to tailor educational content to individual learning styles, creating personalized lesson plans or study guides that cater to diverse educational needs.
- Customized Event Stationery: Apply the data merge feature to design and produce bespoke invitations, programs, and thank-you cards for special occasions, adding a personal touch that guests will treasure.
- Marketing Materials: Harness the power of this process to generate marketing collateral, such as brochures, flyers, and digital banners, each personalized for different segments of your target market.
- Interactive eBooks: Expand your horizons by creating interactive eBooks that incorporate multimedia elements, providing an immersive reading experience.
- Membership Content: Offer your audience a subscription model that delivers fresh, customized content regularly, using this streamlined workflow to keep offering value consistently.
As you bid farewell to the conventional and embrace the digital nomad’s path of content creation, let this strategy be your compass. It has the potential to serve not just as a guide for what we’ve discussed but also as a launchpad for any digital product your imagination can conjure up.
The digital landscape is your oyster, and with these tools and techniques, you’re well-equipped to craft pearls of content that shine with value and appeal. So go forth and create, innovate, and captivate!
Cost Breakdown
- Excel:
- Microsoft 365 Personal subscription: Around $70 per year (includes Excel, other Office apps, and OneDrive Cloud storage).
- Alternatively, if you purchase the standalone version of Office, it can cost around $150 for a one-time purchase, though prices may vary.
- Can also be done for FREE with Google Slides (Save as CSV File and upload to Data Merge Manager)
- Affinity Publisher2:
- One-time purchase cost: $70 for Affinity Publisher 2 or $165 for the suite.
- ChatGPT:
- Assuming you’re using it within its free tier, there’s no cost.
- For more extensive usage, GPT-4 is well worth the $20 monthly, but not completely necessary.
- YayImages:
- Subscription for Extended Licenses on unlimited images: Costs range from $8.75 per month or $150 for a Lifetime subscription.
- Miscellaneous Costs:
- Domain hosting for distributing digital products (if applicable): Around $50 to $150 per year.
- Online marketplace fees (like Etsy): Listing fees are generally $0.20 per item, and they take a 6.5% transaction fee.
- Hardware Costs:
- This is a one-time investment if you don’t already have a computer capable of running these software programs efficiently. A decent computer setup could range from $500 to $2000.
- Marketing and Advertising Costs:
- This can vary widely depending on the scale and channels of your marketing campaign, starting from as little as $100 to several thousand dollars.
This gives us a rough annual cost range of:
- Low end (using free tiers and minimal marketing): Around $200 (basic subscriptions + minimal marketplace costs)
Remember, this doesn’t include the time you invest, which is also a valuable resource. It’s also worth noting that costs could be lower if you already have some of the hardware or software or if you can take advantage of sales or bundled offers.